A clogged bathtub drain can bring a screeching halt to your relaxation plans. Whether it’s a slow drain or a complete standstill, the culprit often lies hidden beneath the bathtub drain plug. But fear not! Removing the plug and tackling the clog beneath is an achievable feat, even for DIY novices. This comprehensive guide will equip you with the knowledge and tools to remove your bathtub drain plug and reclaim your bathing bliss.
Identifying Your Drain Plug Type
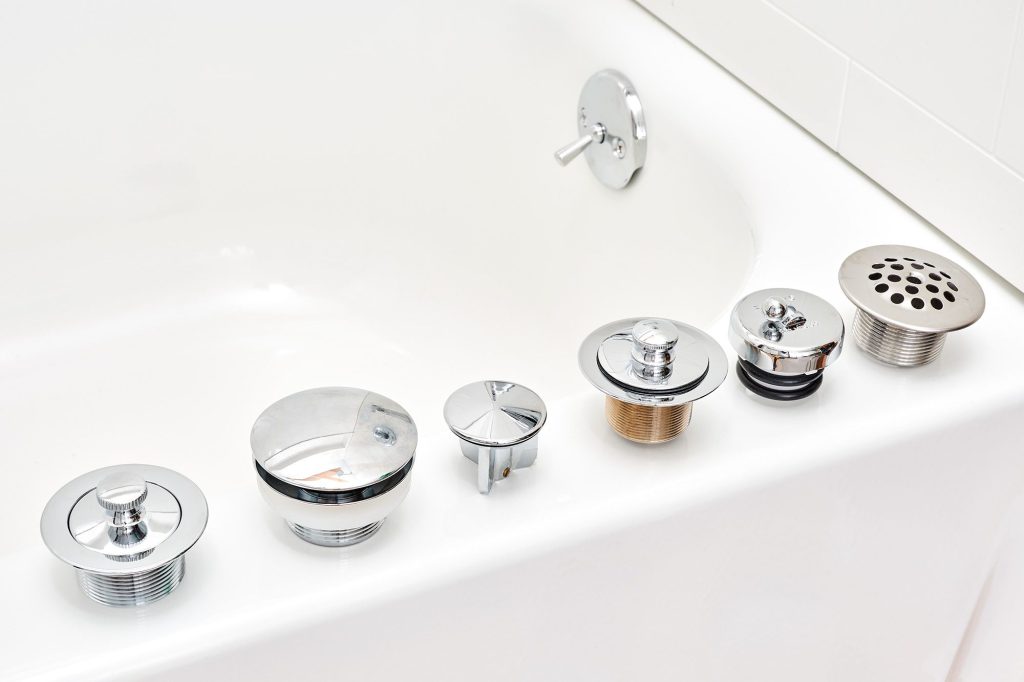
The first step is to identify the type of drain plug you have. Bathtub drain plugs come in a variety of styles, so a little detective work is required. Here are the most common types:
- Lift-and-Turn: This classic design features a knob or handle that you lift and then turn counterclockwise to remove.
- Push-and-Turn: Similar to the lift-and-turn, but the knob operates with a push-down motion before turning counterclockwise.
- Flat Pop-Up: A simple flat disc that presses down to close the drain and pops up when pressed again to open. Some flat pop-up stoppers may unscrew by hand.
- Flip-It Stopper: Hinged on a central axis, this stopper flips up and down to control the drain.
Once you’ve identified your plug type, you can move on to the removal process.

Gathering Your Tools
The tools you’ll need depend on the type of drain plug. Here’s a basic toolkit to have on hand:
- Needle-Nose Pliers: Useful for gripping small components or removing stubborn debris.
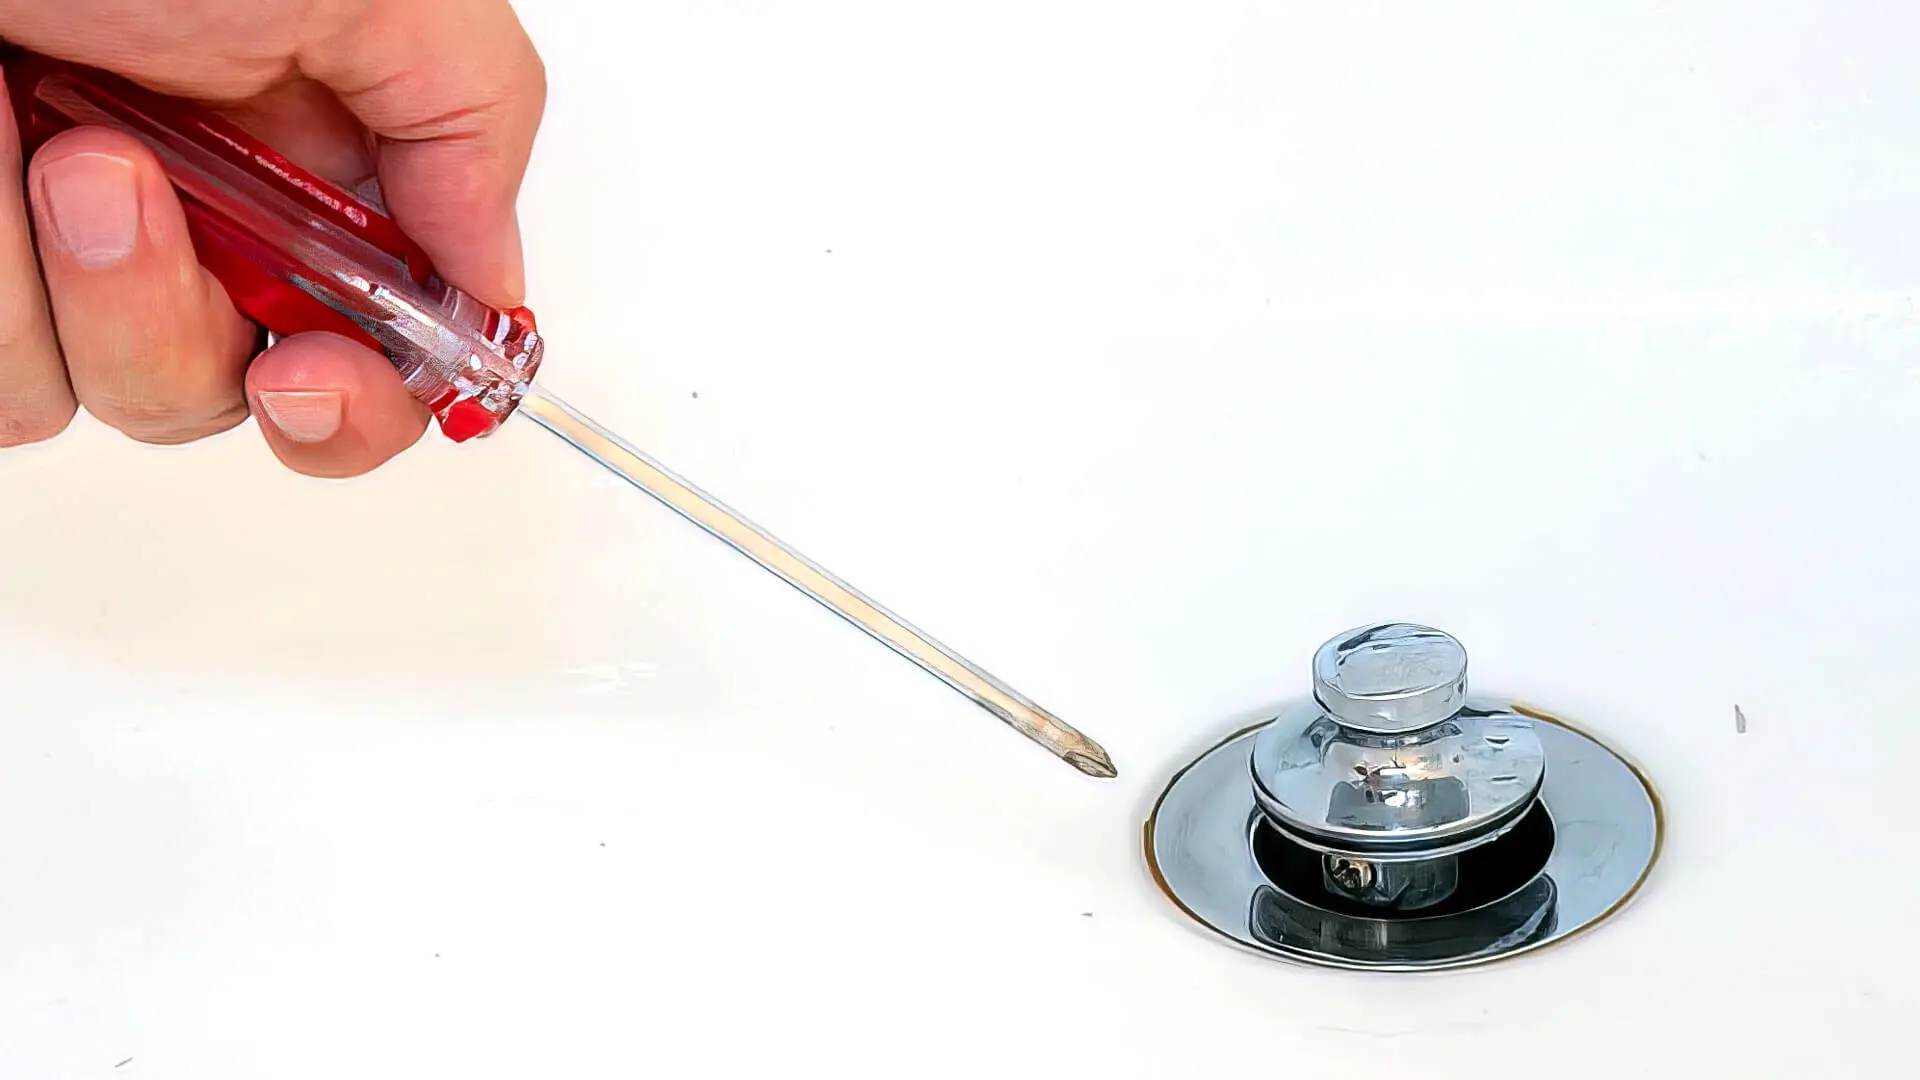
- Flat-Head Screwdriver: Handy for prying loose components or accessing hidden screws.
- Washcloth: Protects your hands and surfaces while working.
- Bucket or Trash Can: To collect any water or debris that may come out when the plug is removed.
- Optional: Flashlight for better visibility under the tub, and a pair of gloves for added comfort.

Removing Your Drain Plug: A Step-by-Step Guide
Now, let’s delve into the removal process for each common drain plug type:
- Lift-and-Turn: With the drain open, firmly grasp the knob and lift it slightly. While holding the knob up, turn it counterclockwise. The plug should unscrew and come free from the drain opening.
- Push-and-Turn: Similar to the lift-and-turn, but first press down on the knob to disengage the locking mechanism. Then, while holding the knob down, turn it counterclockwise to remove.
- Flat Pop-Up: For some flat pop-up stoppers, a simple counterclockwise twist by hand might be enough. If not, try gently prying it loose with your fingers or a flat-head screwdriver (be careful not to scratch the finish).
- Flip-It Stopper: These stoppers typically have a small access panel on the overflow plate (the rectangular opening near the top of the tub). Use a flat-head screwdriver to pry open the access panel, then locate a screw or lever that controls the flip-it mechanism. By adjusting this screw or lever, you can release the stopper and remove it.

Pro Tips for a Smooth Removal
- Stuck Plugs: If your plug is stubborn and won’t budge, don’t force it. Excessive force can damage the mechanism. Try applying a light lubricant, like WD-40, around the threads to loosen any grime buildup. Let it sit for a few minutes before attempting removal again.
- Hidden Screws: Some lift-and-turn stoppers have a hidden set screw located near the base of the knob. Look for a small indentation – this might house the screw. Use a screwdriver to loosen the screw slightly before attempting to remove the knob.
- Lefty Loosey, Righty Tighty: Remember the golden rule – most drain plugs are removed by turning them counterclockwise (lefty loosey).

Address common issues that might arise during the removal process, such as stuck or rusty plugs
There are a few different types of bathtub drain plugs, but most can be removed by following these steps:
Identify the type of drain stopper:
- Lift and turn: This is the most common type. The knob lifts up and then turns counter-clockwise to unscrew from the drain.
- Push-pull: This type opens and closes by simply pushing or pulling on the stopper itself.
- Flat grate: This type usually requires a screwdriver to unscrew the grate from the drain opening.
Removing the stopper:
- Once you’ve identified the type, for lift and turn stoppers, lift the knob and turn it counter-clockwise until it detaches from the drain.
- For push-pull stoppers, simply pull up on the stopper to remove it.
- For flat grates, you might need a flathead screwdriver to unscrew the grate from the drain opening by turning it counter-clockwise.
Addressing common removal issues:
- Stuck plug: If the stopper is stuck, try applying some penetrating oil around the threads and letting it sit for a few minutes to loosen any corrosion. You can also try gently tapping the top of the stopper with a rubber mallet to loosen it.
- Rusty plug: For a rusty plug, along with penetrating oil, you might need to use pliers or a wrench to grip the stopper (be careful not to scratch the finish) and turn it counter-clockwise. As a last resort, if the rust is severe, you may need to replace the stopper entirely.
- Broken knob: If the knob on a lift and turn stopper is broken, you might be able to remove the stopper with needle-nose pliers by gripping the part of the shaft that the knob usually attaches to and turning counter-clockwise.
Here are some additional tips:
- If you’re still having trouble removing the stopper, you can find video tutorials online that can walk you through the process specific to your type of drain stopper [YouTube: How to Remove Bathtub Drain Stopper].
- Be careful not to use too much force when trying to remove the stopper, as you could damage the drain.
- If you’re not comfortable removing the stopper yourself, you can always call a plumber for help.

Once You’ve Removed the Plug: Cleaning and Reassembly
With the plug removed, you can now access the drain opening and tackle the clog. Here are some additional tips:
- Drain Snake: For stubborn clogs, consider using a drain snake, a long, flexible cable that can reach deep into the drain to remove hair and debris.
- Baking Soda and Vinegar: A natural cleaning solution – pour half a cup of baking soda down the drain followed by a cup of hot vinegar. The mixture will fizz and help break down organic matter. Let it sit for 30 minutes before flushing with hot water.
- Reassembly: Once the clog is cleared, clean the drain plug thoroughly and reassemble it in the reverse order of removal. Ensure all components are secure and the drain functions properly.


