Have you ever encountered a lamp with a frayed cord or an appliance begging for a new lease on life? Before tossing it out, consider this: with a little know-how, you can revive these electronics by simply rewiring the plug. It might seem daunting at first, but wiring a plug is a surprisingly straightforward task. This comprehensive guide will equip you with the knowledge and confidence to tackle this project safely and effectively.
Safety First: Essential Precautions
Electricity is a powerful force, and respect is paramount. Here are some crucial safety measures to take before you begin:
- Unplug everything: Disconnect any appliance or lamp from the power source before starting. Double-check to ensure it’s completely off.
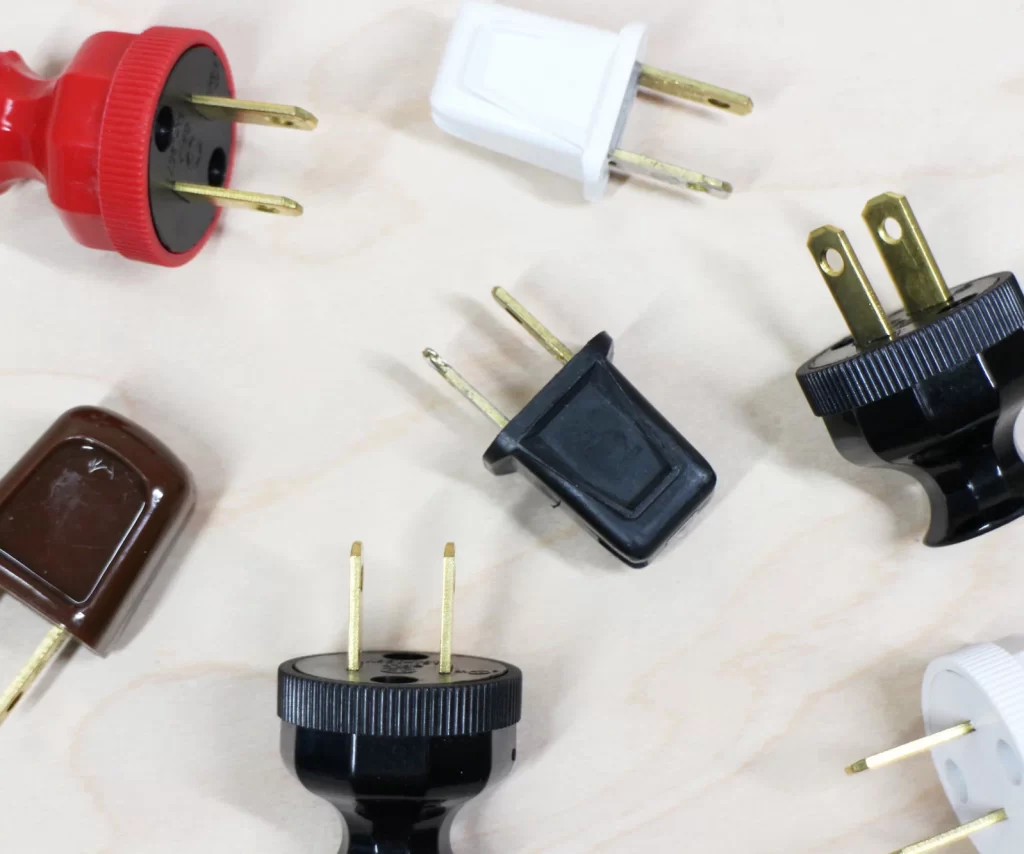
- Gather the right tools: You’ll need a pair of wire strippers, a flat-head screwdriver, and a replacement plug that matches the cord you’re working with.
- Work in a well-lit area: Good lighting helps you see the wires clearly and avoid mistakes.
- Use caution with sharp objects: Wire strippers can be sharp, so handle them carefully to prevent cuts.
Preparing the Cord: Stripping and Separating
Now that safety is in order, let’s get started!
-
Isolating the Damaged Section: Locate the damaged portion of the cord. If the damage is extensive, it’s best to replace the entire cord. Otherwise, cut the cord a few inches above the damaged area to ensure fresh, undamaged wire.
-
Stripping the Wires: Utilize the wire strippers to carefully remove a small section of insulation from each of the two wires within the cord. Be mindful not to strip too much insulation, as this will expose too much bare wire and create a safety hazard. Generally, a quarter-inch of stripped wire is sufficient.
-
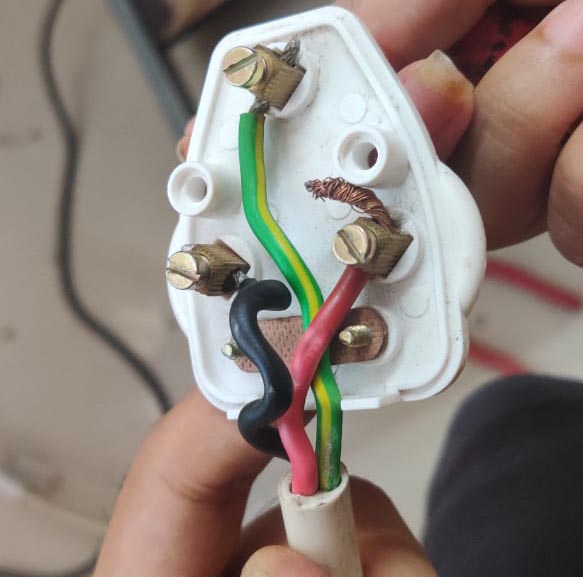
Separating the Wires: Once stripped, gently separate the two wires for easier handling. Most cords have a colored insulation on each wire. Typically, one wire will be white or gray (neutral) and the other black, brown, or red (hot).
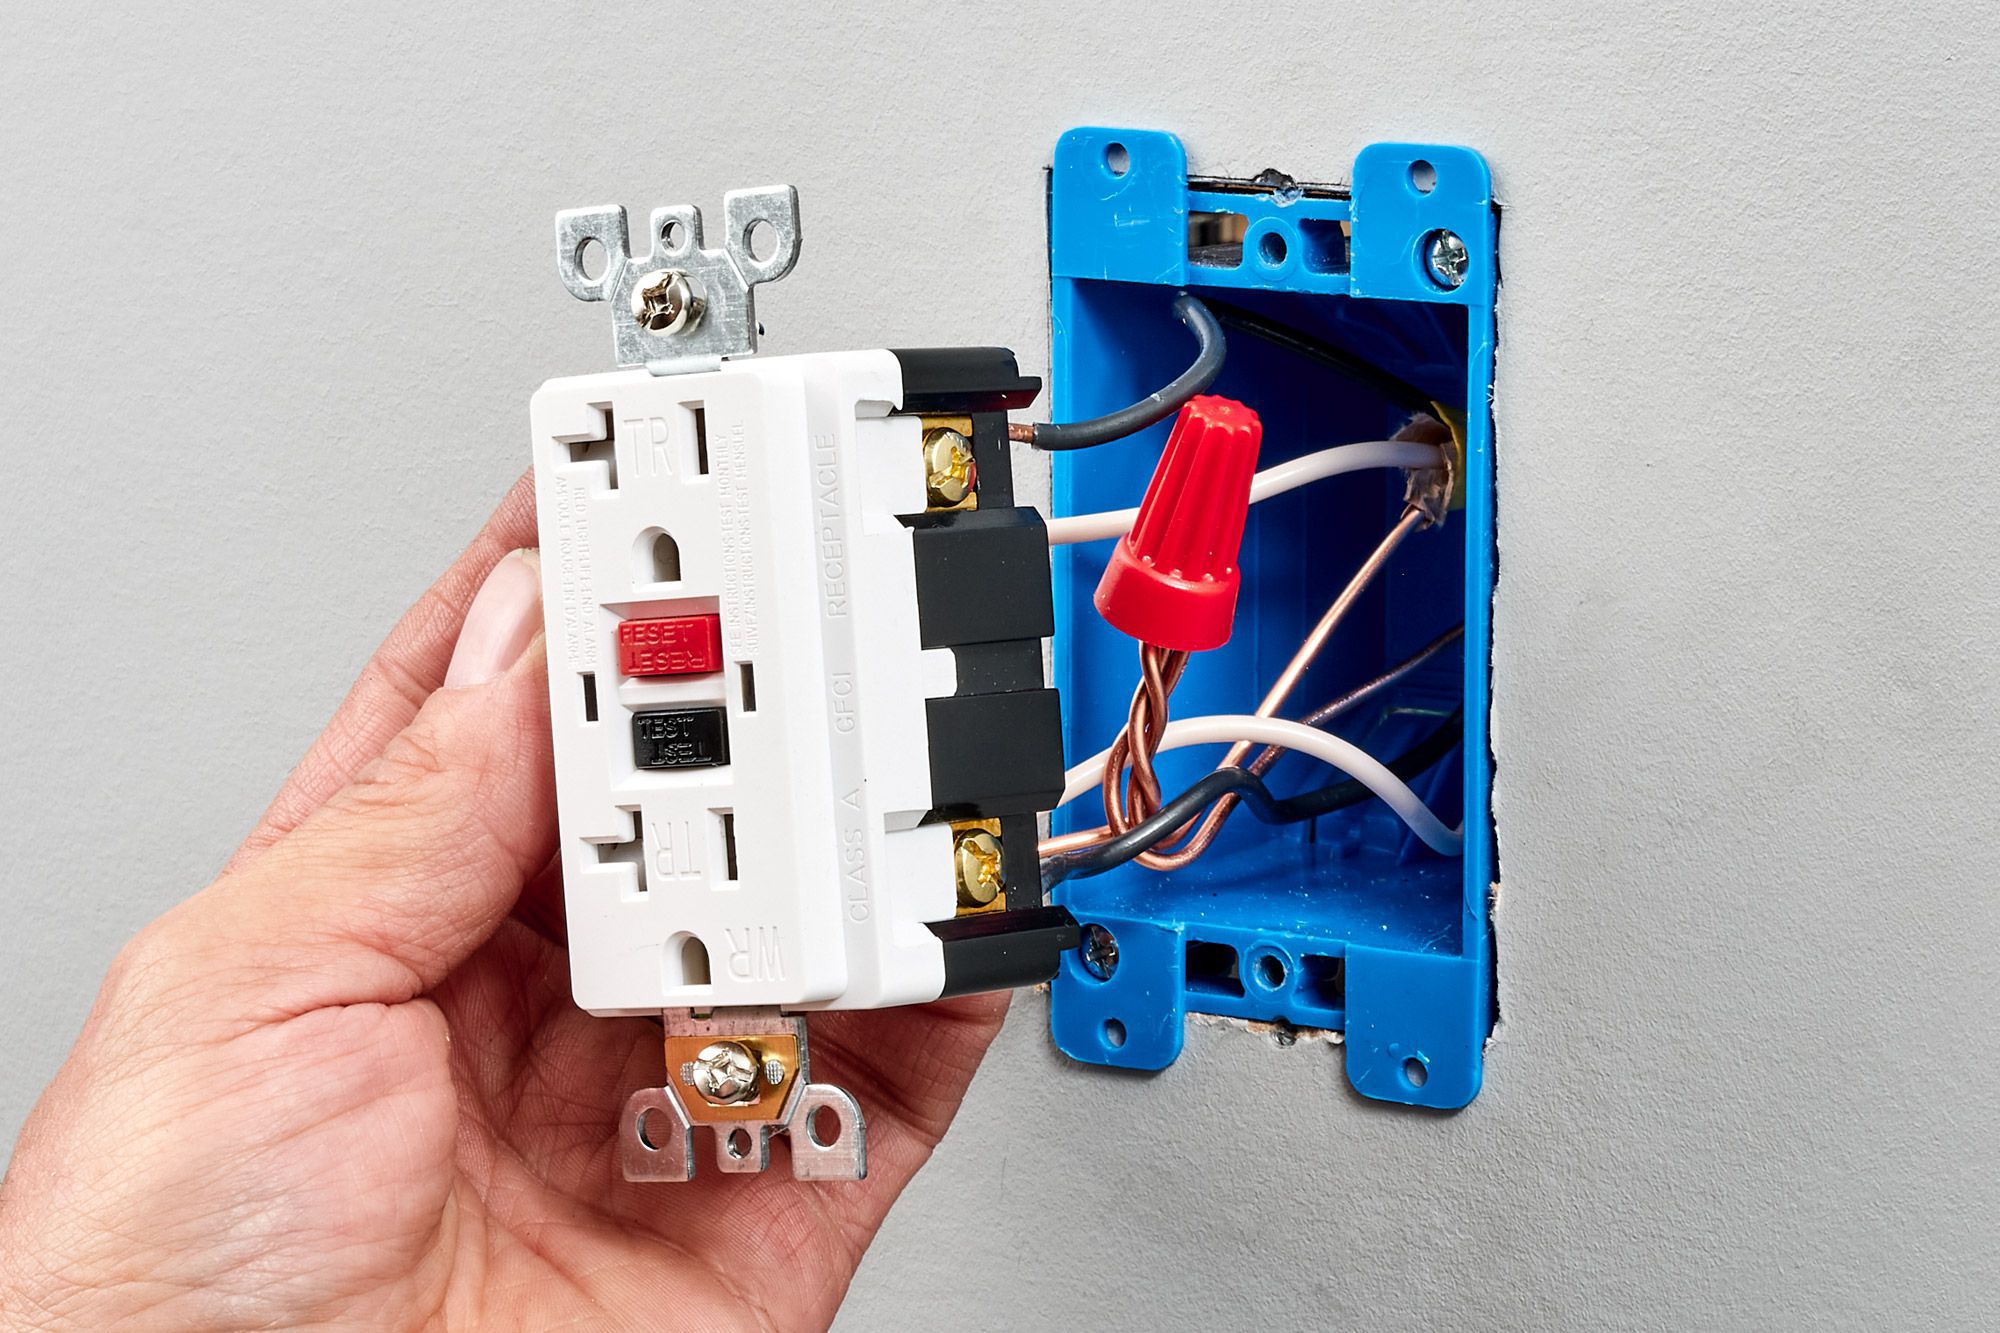
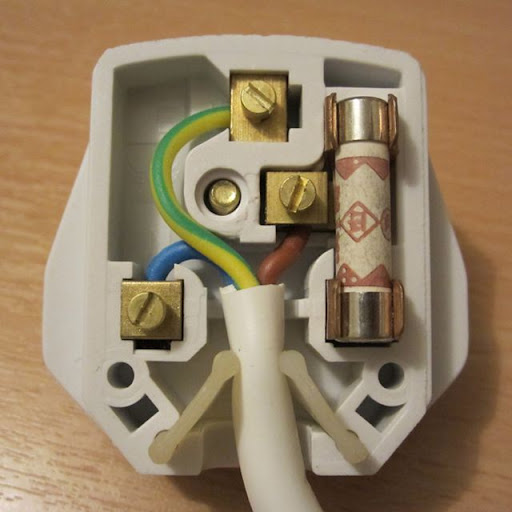
Understanding the Plug: Terminals and Assembly
Now, let’s turn our attention to the new plug you acquired.
-
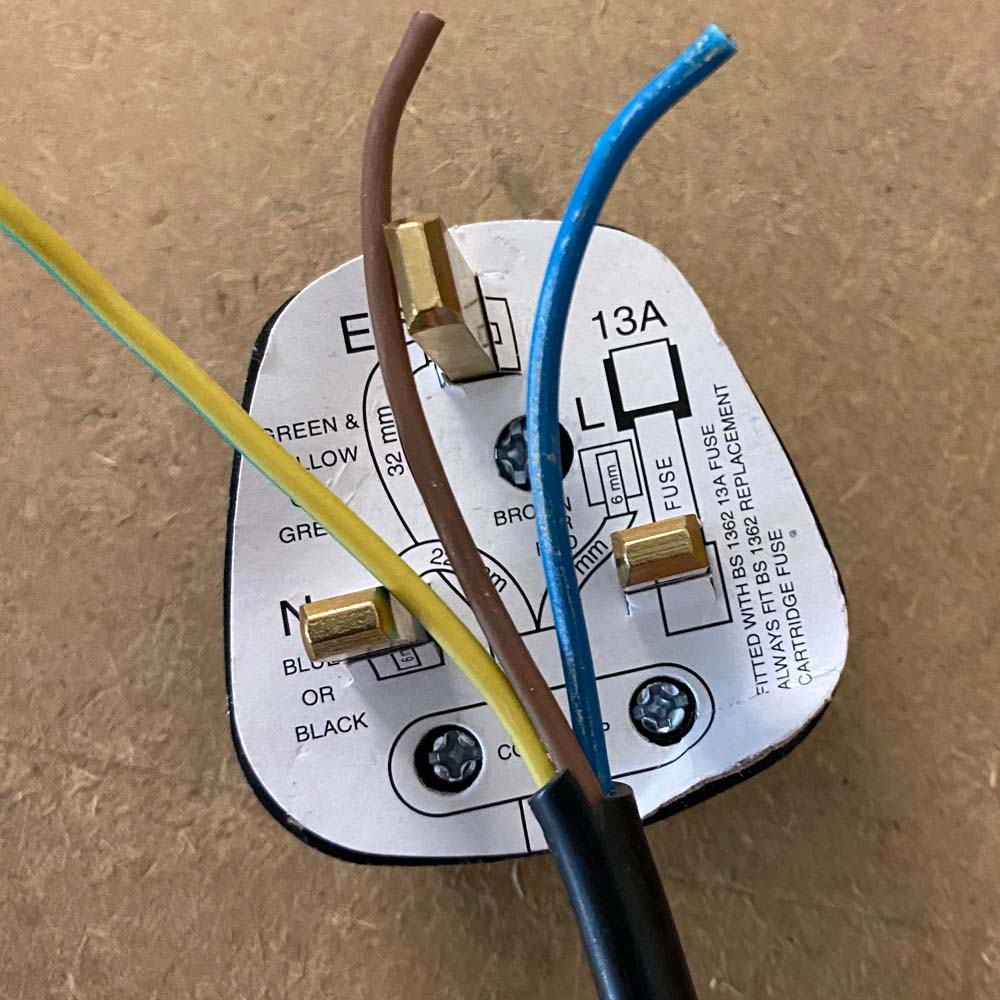
Identifying the Terminals: Most plugs have two screw terminals and a grounding screw. The screw terminals will likely be different colors or have markings to indicate which wire goes where. In a polarized plug, the wider prong corresponds to the neutral wire (usually silver-colored screw), while the narrower prong connects to the hot wire (usually brass-colored screw). Non-polarized plugs don’t have designated slots, so the order of hot and neutral doesn’t matter.
-
Grounding is Key: The grounding screw, often green or bare metal, is for the bare copper wire within the cord (if present). This wire provides a safety path for any stray current, preventing shocks.
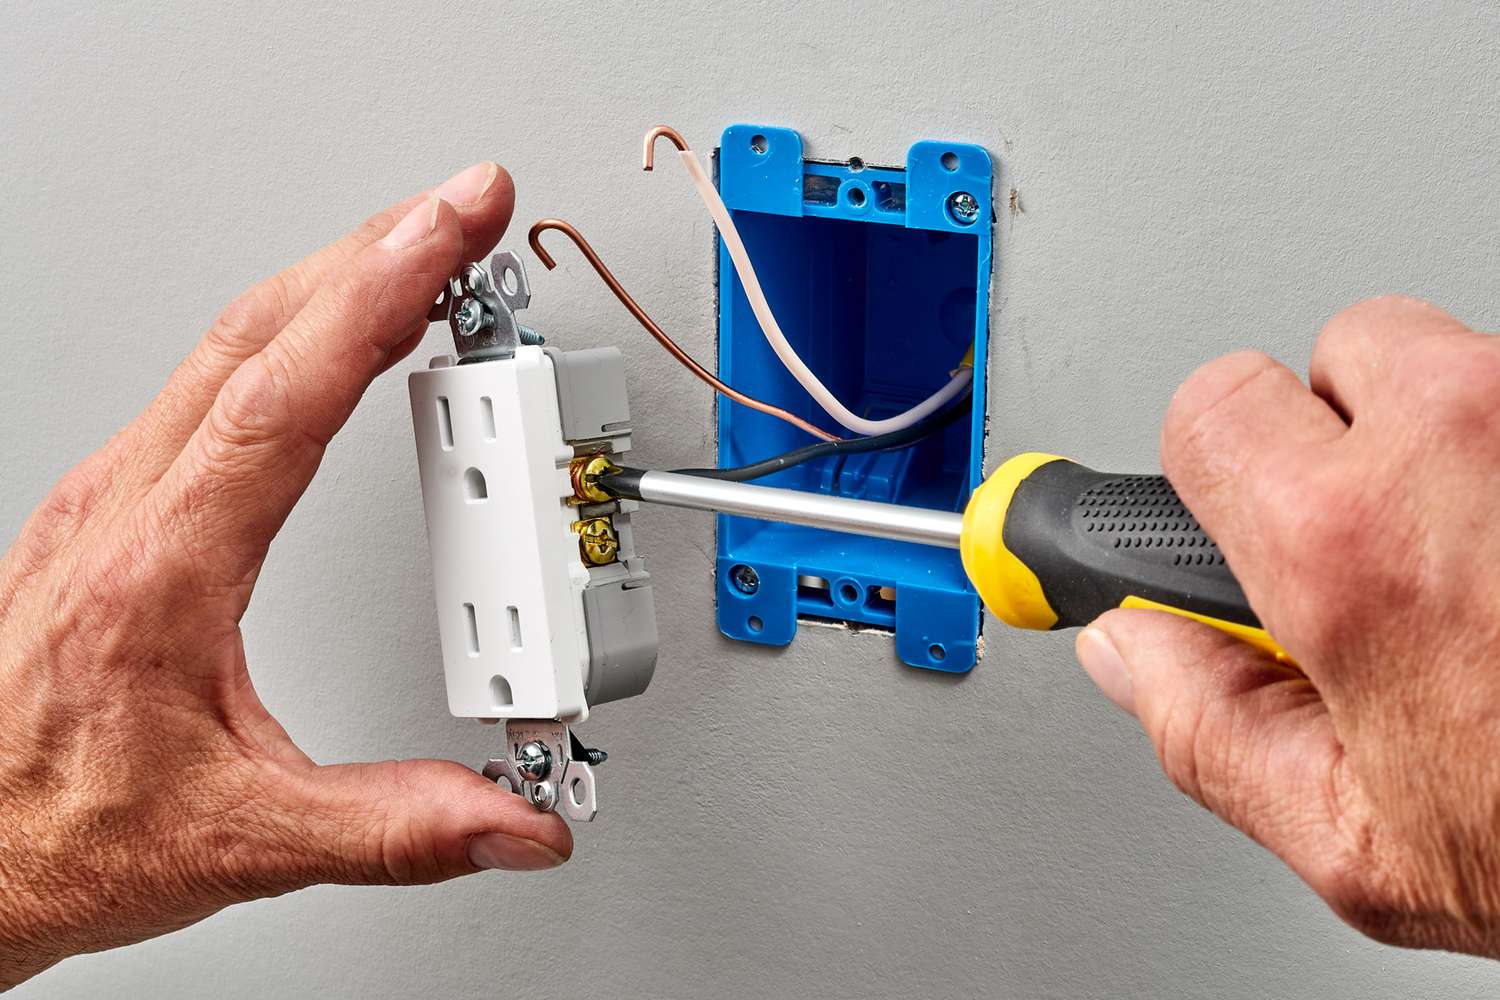
Making the Connection: Secure and Organized
We’re almost there! Now comes the part where you connect the wires to the terminals.
-
Forming the Hooks: Using the bare ends of the stripped wires, create small hooks with a needle-nose pliers if needed. These hooks will help secure the wires under the terminal screws.
-
Connecting the Wires: Carefully wrap the hook of the neutral wire (usually white or gray) around the screw terminal designated for neutral (usually silver). Likewise, connect the hot wire (usually black, brown, or red) to its corresponding terminal (usually brass). Ensure the bare wire makes good contact with the screw and doesn’t touch other terminals.
-
Tightening the Screws: Use the screwdriver to firmly tighten the screws on each terminal. A secure connection is crucial to prevent overheating and potential fire hazards. Don’t overtighten them, though, as this can damage the screw threads.
-
Grounding (if applicable): If your cord has a bare copper wire, wrap its end around the grounding screw and tighten it securely.
-
Double-Checking Connections: Before assembling the plug housing, double-check that all the connections are secure and no bare wire is exposed.
-
Assembling the Plug Housing: Most plugs have a snap-on housing. Carefully align the housing halves and snap them together firmly.
-
Securing the Cord Strain Relief: The cord strain relief is the clamp at the base of the plug that prevents the cord from being yanked loose. Tighten the strain relief screw to secure the cord in place.
Testing and Success: Powering Up Safely
Now that your rewiring is complete, it’s time for a cautious test run.
- Visual Inspection: Do a final visual inspection to ensure everything looks neat and secure.
-
Testing with a Circuit Tester (Optional): If you have a circuit tester, you can use it to verify that the plug is wired correctly. Follow the instructions on your specific tester for proper usage.
-
Plugging In (Finally!): Find a power outlet that’s not overloaded with other appliances. Plug in your newly rewired appliance and turn it on. If it works properly, congratulations! You’ve successfully tackled wiring a plug.
Unplugging the device by gripping the plug itself instead of tugging the cord
You’re absolutely right! It’s much safer to unplug a device by grabbing the plug itself rather than yanking on the cord. Here’s why:
- Cord Strain: Pulling on the cord puts unnecessary stress on the internal wires. Over time, this repeated strain can weaken the connection between the cord and the plug, potentially leading to frayed wires, sparking, or even fire.
- Plug Damage: The constant tugging on the cord can also damage the plug itself. The prongs can become loose or misaligned, creating a poor connection and increasing the risk of overheating.
- Safer Grip: The plug is designed to be gripped for easy removal. Grabbing the plug provides a more secure hold and reduces the chance of the cord slipping out of your hand and causing a sudden jerk.
Making it a Habit:
By forming the habit of unplugging by the plug, you’ll not only extend the lifespan of your cords and appliances but also ensure your safety by minimizing electrical hazards.
Additional Tips and Considerations
Here are some additional pointers to keep in mind:
-
Match the Plug to the Cord: Ensure the replacement plug you purchase is compatible with the type of cord you’re working with. There are different plug configurations for various appliances.
-
Discarding Old Plugs: Don’t reuse the old damaged plug. Dispose of it responsibly, following your local regulations for electronic waste.
-
When in Doubt, Seek Help: If you’re unsure about any step in the process, don’t hesitate to consult a qualified electrician. Their expertise can ensure the safety and proper functioning of your appliance.
By following these steps and considerations, you can confidently add “wiring a plug” to your DIY repertoire. Remember, safety is paramount when working with electricity. Take your time, be meticulous, and you’ll be well on your way to giving your electronics a new lease on life.