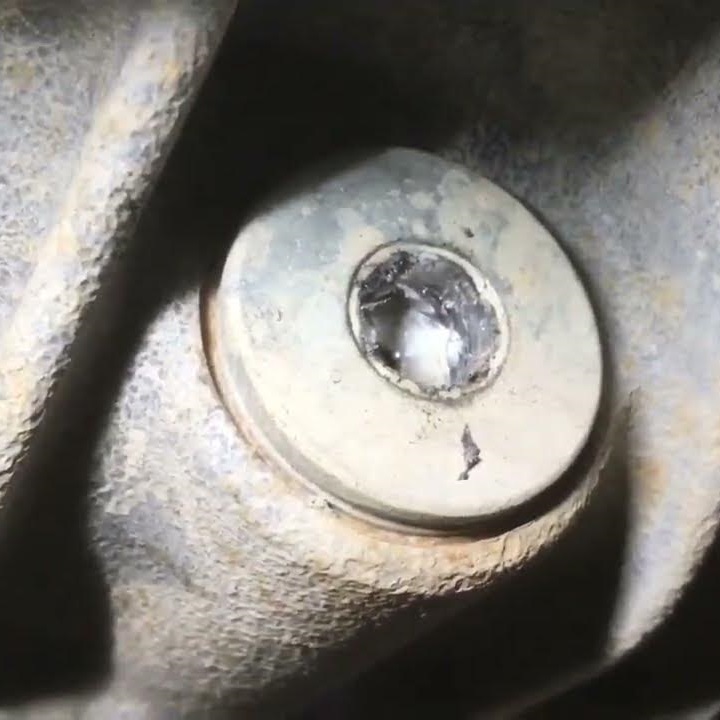
The routine oil change – a straightforward task for many car enthusiasts. But sometimes, even the simplest maintenance procedures can throw a curveball. A stuck oil drain plug is a common frustration that can leave you scrambling for solutions. Fear not, weekend warriors! This guide equips you with the knowledge and techniques to tackle this challenge.
Understanding the Culprit
Several factors can contribute to a stubborn oil drain plug. Here are the most likely culprits:
- Overtightening: The most common reason. Excessive force during installation can bind the threads, making removal difficult.
- Corrosion: Exposure to the elements can cause rust to accumulate on the threads, creating a tight bond.
- Sealing Compounds: Some mechanics use thread sealant for extra leak prevention. While effective, it can add to the removal difficulty.
- Cross-Threading: This occurs when the bolt isn’t screwed in straight, causing misalignment and potential damage to the threads.
Gathering Your Arsenal
Before diving in, ensure you have the right tools and materials:
- Socket Wrench: The size will depend on your specific vehicle. Consult your owner’s manual for the correct size.
- Breaker Bar: This extends the leverage of your socket wrench, providing additional turning force.
- Penetrating Oil: WD-40 is a popular option, but there are other dedicated penetrating lubricants available.
- Replacement Oil Drain Plug: It’s wise to have a new plug on hand in case the old one gets damaged during removal.
- Rags: For cleaning and wiping up spills.
- Oil Drain Pan: To collect the used oil.
- Safety Glasses: Eye protection is crucial when working with fluids.

Loosening the Grip: A Step-by-Step Approach
-
Preparation is Key: Park your car on a level surface and engage the parking brake. Allow the engine to cool slightly – a warm engine promotes oil flow, but scorching hot oil can burn you. Locate the oil drain plug beneath the engine oil pan.
-
Penetrating Power: Apply penetrating oil generously around the base of the plug. Let it sit for at least 15 minutes, allowing the lubricant to seep into the threads and break down any corrosion. Reapply if necessary.
-
Socket It to Me: Using the correct size socket wrench, firmly attach it to the oil drain plug. Ensure a snug fit to avoid rounding off the corners.
-
Engage the Breaker Bar: If a standard socket wrench doesn’t budge the plug, it’s time for the breaker bar. Attach the socket wrench to the breaker bar and carefully apply force in a counter-clockwise direction (standard loosening direction). Remember, controlled, steady pressure is more effective than brute force.
-
Tapping for Freedom: Sometimes, a gentle tap can help loosen a stubborn plug. Use a hammer and a flat-edged object (like a wrench) to deliver sharp, controlled taps to the side of the breaker bar (not directly on the plug). The vibration can disrupt the bond between the threads.
-
Heat Things Up (As a Last Resort): If the above methods fail, applying controlled heat can be a last resort. Caution: This should only be done with extreme care, as overheating can damage the oil pan or surrounding components. Use a heat gun (not a torch) and focus the heat on the base of the plug, avoiding prolonged exposure. Never apply heat directly to the oil pan. Once warm, attempt removal again using the breaker bar.
-
Success! (But Not Quite Yet): Once the plug loosens, slowly unscrew it the rest of the way by hand. Be prepared for a rush of oil – have your drain pan positioned correctly to catch it.
Dealing with a Rounded Plug: A Different Kind of Battle
If your attempts result in a rounded plug head, fret not. Here are a couple of options:
- Socket for a Rounded Fit: Specialized sockets designed for gripping rounded fasteners might be the solution. These sockets have internal teeth that bite into the rounded head, allowing for removal.
- The Hammer and Chisel Method (For Experts Only): As a last resort, carefully insert a chisel (slightly smaller than the plug head) into a notch created with a hacksaw on the plug head. Using controlled taps with a hammer, attempt to turn the plug in the loosening direction. Extreme caution is advised, as this method risks damaging the oil pan if not done correctly. Consider seeking professional help if unsure.
Putting it Back Together: A Time for TLC
Once the old plug is out, dispose of it responsibly. Clean the threads on the oil pan opening thoroughly. Apply a light coat of fresh oil to the threads of the new drain plug. Do not use thread sealant unless your manufacturer specifically recommends it. Screw the new plug in by hand until snug, then tighten it further using a wrench. Remember, hand-tight is sufficient, don’t overtighten! Consult your owner’s manual for the recommended torque specification for your vehicle.
Cleaning Up and Disposal
Replace the drain pan and tighten the filter. Refill the engine with fresh oil according to your vehicle’s recommended capacity. Check for any leaks around the drain plug after starting the engine and letting it run for a few minutes.
Finally, dispose of the used oil and filter responsibly. Many auto parts stores and service stations accept used oil for recycling. Never pour used oil down the drain or onto the ground!
Safety precautions and final thoughts
Throughout this guide, safety has been a primary focus. Remember, you’ll be working with hot oil and underneath your vehicle. Here are some key safety precautions to reiterate:
- Park on a level surface and engage the parking brake. This prevents the vehicle from rolling while you’re working underneath.
- Allow the engine to cool slightly. Hot oil can cause burns. Aim for a warm engine, not scorching hot.
- Wear safety glasses. Protect your eyes from splashing oil or debris.
- Use gloves. Oil can be slippery and irritate skin. Consider using disposable nitrile gloves for better protection.
- Be mindful of fluid drainage. Have a drain pan ready to catch the used oil and avoid spills.
- Lower the vehicle carefully. If using ramps, ensure they are properly secured and rated for your vehicle’s weight.
Final Thoughts
Conquering a stuck oil drain plug can be a rewarding experience. However, if you encounter significant difficulty or are unsure about any step, don’t hesitate to consult a professional mechanic. Their expertise can ensure the job is done safely and effectively. Remember, preventative maintenance is key. Sticking to your recommended oil change intervals and following proper tightening procedures can significantly reduce the risk of a stuck drain plug in the future. Regular oil changes also promote better engine health and performance, keeping your car running smoothly for miles to come.
The Importance of Regular Oil Changes and Maintenance
Sticking to your recommended oil change intervals goes beyond just topping off your engine’s lubricant. It’s a crucial part of preventative maintenance that can help prevent a stuck drain plug and ensure the overall health of your vehicle. Here’s how:
- Fresh Oil, Smooth Operation: Clean oil acts as a lubricant, reducing friction between engine parts. This not only prevents wear and tear but also contributes to smoother engine operation and potentially better fuel efficiency.
- Reduced Corrosion: Regular oil changes help remove contaminants and byproducts that can accelerate corrosion on the drain plug and other engine components.
- Early Detection of Issues: During an oil change, mechanics can inspect the oil for signs of wear and tear or potential problems. Addressing these issues early can prevent costly repairs down the road.
By making regular oil changes a priority, you’re not just saving yourself the hassle of a stuck drain plug, you’re also investing in the longevity and performance of your car.
Beyond the Basics: Preventative Measures
Preventing a stuck drain plug is much easier than dealing with one. Here are some tips:
- Use the right tools: Always use the correct size socket wrench for your drain plug.
- Snug, not Superman: Tighten the drain plug firmly but not excessively. A torque wrench can help ensure proper tightness.
- No to Overzealous Thread Sealant: Avoid using excessive thread sealant, a thin coat is sufficient.
- Regular Oil Changes: Sticking to your recommended oil change intervals helps prevent corrosion and buildup on the threads.
By following these steps and preventative measures, you can turn a potentially frustrating oil change into a smooth and successful operation. Remember, if you encounter any difficulties or are unsure about any step, don’t hesitate to consult a professional mechanic. Their expertise can save you time, frustration, and potentially prevent damage to your vehicle.