Have a lamp with a damaged cord or an appliance in need of a new plug? Don’t rush out to buy a replacement just yet! With a few basic tools and some know-how, you can easily wire a new plug yourself. However, it’s crucial to prioritize safety throughout the process. Electricity can be dangerous, so following these instructions carefully is essential.

Before You Begin: Safety First
- Turn off the power: This is the golden rule of electrical work. Locate the circuit breaker that controls the outlet you’ll be using and turn it off completely. Double-check that there’s no power by using a voltage tester before you proceed.
- Gather your tools: You’ll need a wire stripper, a pair of pliers, a screwdriver (usually a Phillips head), and the new plug itself.
- Choose the right plug: There are different types of plugs designed for various purposes and regions. Make sure the plug you purchase matches the appliance and your local electrical standards.
Getting Started: Preparing the Cord
-
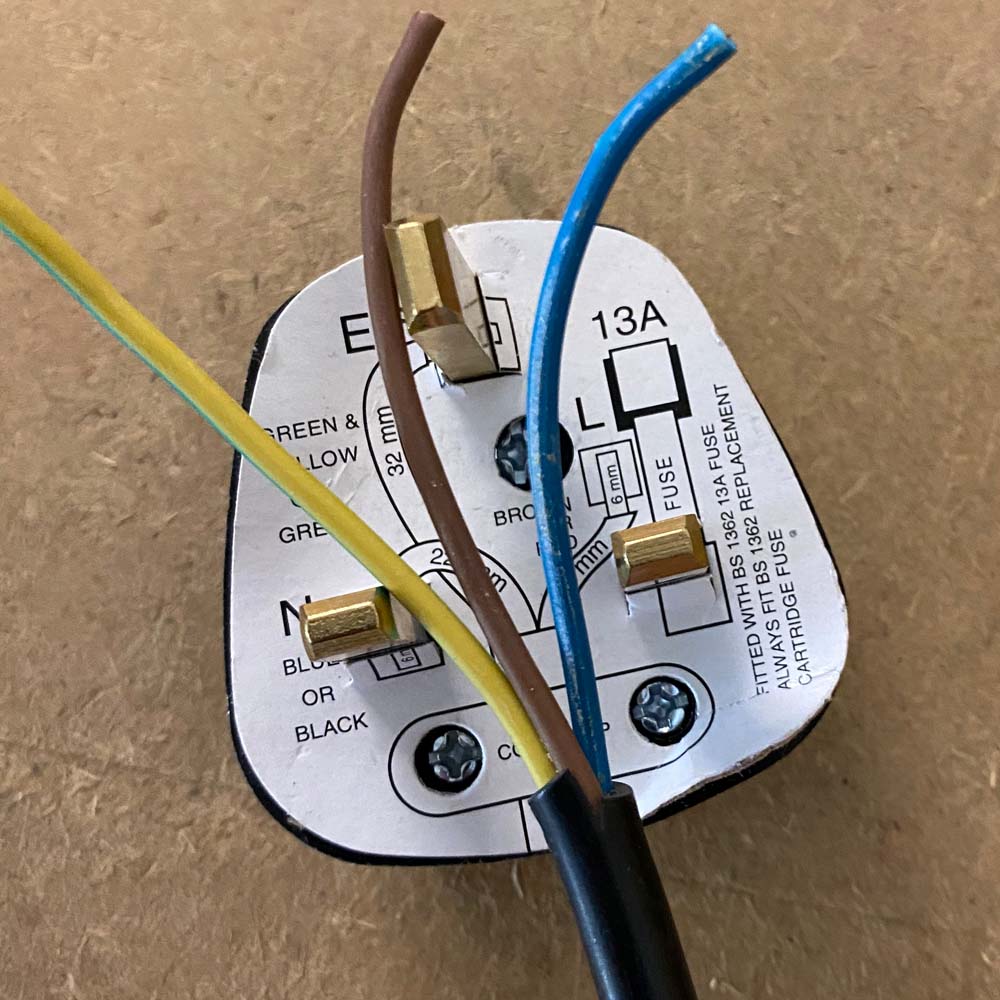
Strip the wire: Locate the end of the cord you’ll be attaching the plug to. Use the wire stripper to carefully remove a designated length of the outer insulation, typically around ½ inch. Be mindful not to nick or damage the copper wires underneath.
-
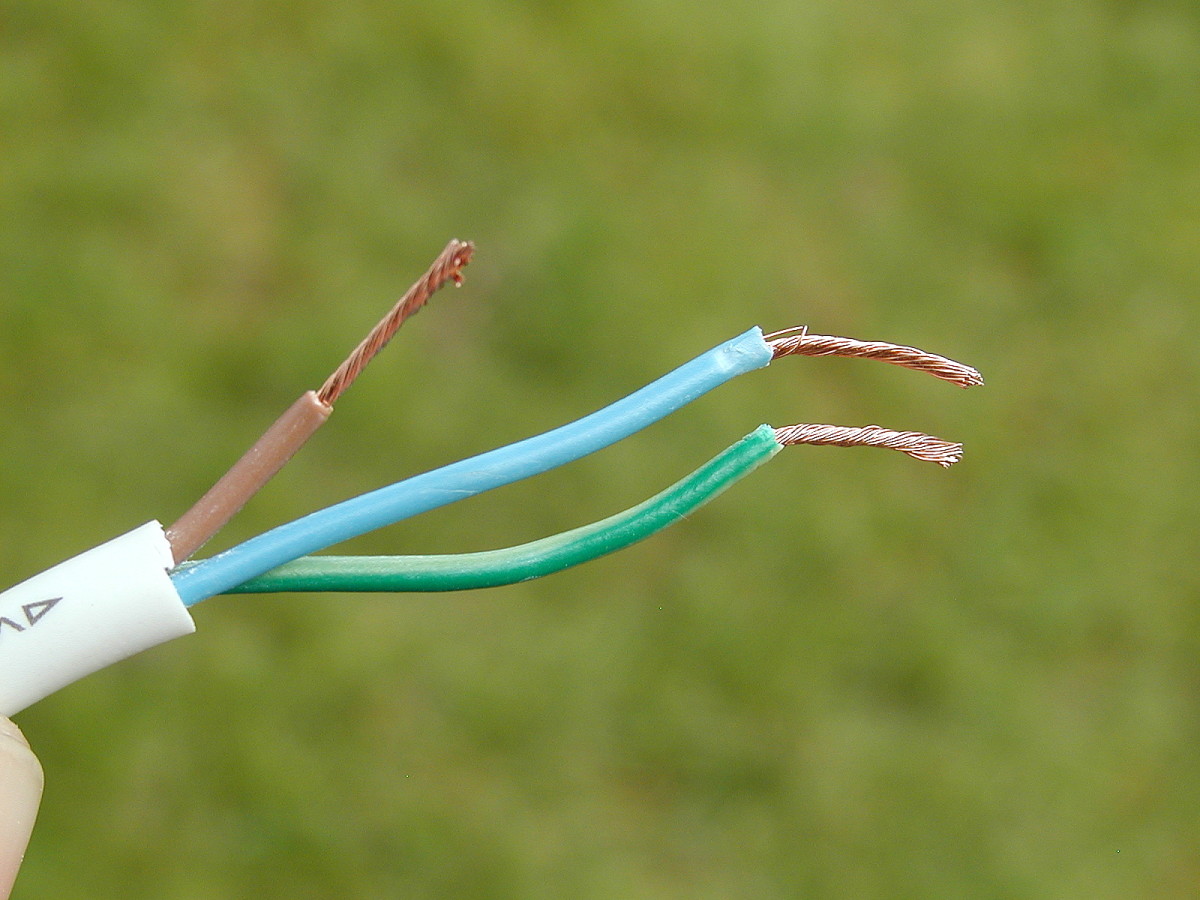
Separate the wires: Inside the cord, you’ll find two or three wires. In most cases, there will be a black or colored wire (hot), a white or gray wire (neutral), and possibly a bare copper wire (ground). Carefully separate these wires by gently pulling them apart.
-
Straighten the wires: Use your pliers to straighten out the last ½ inch or so of each individual wire. This will make them easier to work with when making the connections.
Making the Connections
Now comes the critical part: connecting the wires to the terminals on the new plug. Most plugs will have three terminals: a brass screw for the hot wire, a silver screw for the neutral wire, and a green screw (or grounding clip) for the ground wire (if present).
-
Identify the terminals: The terminals on the plug won’t always be explicitly labeled, but there are usually visual cues. The brass screw is typically on the narrower prong of the plug, while the silver screw is on the wider prong. The ground terminal is usually green or has a different colored screw head altogether. Double-check your plug’s instructions if you’re unsure.
-
Connect the hot wire: Take the stripped end of the black or colored wire and wrap it securely around the screw terminal designated for the hot wire (usually brass). Tighten the screw firmly with your screwdriver, ensuring the bare copper wire makes good contact. Don’t overtighten, or you can damage the wire.
-
Connect the neutral wire: Repeat the same process for the white or gray wire, connecting it to the silver screw terminal (neutral).
-
Connect the ground wire (if present): If your cord has a bare copper wire, it’s the ground wire. Wrap it around the green screw terminal or secure it under the grounding clip provided on the plug. Tighten the screw or clip firmly.
Double-Checking and Finishing Touches
-
Double-check your connections: Give all the terminal screws a final twist to ensure they’re secure. Visually inspect the connections for any loose strands or exposed wire.
-
Assemble the plug: Most plugs have two parts: a base and a housing. Carefully tuck the excess wire neatly inside the base, then fit the housing back on and secure it with the designated screw.
-
Strain relief: Many plugs have a strain relief mechanism, typically a screw-on clamp at the base of the cord. Tighten this to prevent the cord from pulling loose at the plug connection.
-
Test the plug (optional): If you have a plug tester, you can use it to verify that the plug is wired correctly. However, never plug the appliance in yet!
Final Steps: Power Up
-
Return power: Once you’re confident that everything is wired correctly, head back to the circuit breaker and turn the power back on.
-
Test the appliance: Now you can finally plug in your appliance and test it. If it works properly, you’ve successfully wired a new plug!

Additional Tips
-
Match wire gauge: Make sure the new plug you purchase is rated for the same wire gauge (thickness) of the cord you’re working with.
-
Use the correct tools: Don’t improvise with tools that aren’t designed for electrical work. A good wire stripper will ensure clean and precise cuts.
-
Not comfortable? Don’t hesitate to seek help: If you’re unsure about any step of the process, it’s always best to err on the side of caution. Consult a qualified electrician for assistance. Electrical work can be dangerous, and a professional can ensure your appliance is safe to use.
-
Keep it organized: As you work, keep the wires separated and avoid letting them tangle. This will make the wiring process much smoother.
-
Discard old plugs safely: Don’t throw away the old plug in the trash. Most electronic waste recycling centers accept old plugs.
Troubleshooting:
Appliance not working:
If your appliance doesn’t work after wiring the new plug, double-check your connections. Ensure each wire is securely fastened to the correct terminal and there are no loose strands. You can also try a different outlet to rule out outlet-related issues.
Sparks or burning smell:
If you see sparks or smell something burning while testing the appliance, immediately turn off the power and unplug the appliance. There’s likely a short circuit somewhere in the wiring. Do not attempt to fix it yourself and consult a qualified electrician.
Proper positioning of the plug to avoid strain on the wires
- Minimize bends: Avoid sharp bends in the cord where it exits the plug. Ideally, the cord should exit the plug in a straight line with minimal initial curve.
- Leave slack: Don’t pull the cord taut when plugging the appliance in. Leave some slack in the cord near the plug, allowing some give and preventing strain on the connection point.
- Avoid furniture pressure: Don’t position the plug or cord behind furniture where it might get pinched or compressed. This can damage the wires over time.
- Think about weight distribution: If the cord is heavy or the appliance itself is bulky, consider using a strain relief device. These attach to the wall or furniture near the outlet, taking the weight of the cord off the plug connection.
- Mind the floor: Avoid running the cord over sharp edges or areas with high foot traffic. This can cause wear and tear on the cord’s insulation.
By following these tips, you can significantly reduce strain on the wires at the plug connection, ensuring your appliance functions safely and lasts longer.
Wiring a plug can be a rewarding DIY project that saves you money and allows you to breathe new life into old appliances. However, remember to prioritize safety throughout the process. By following these step-by-step instructions and using caution, you can successfully wire a plug and keep your home’s electrical system functioning smoothly.